Archive for the ‘ Home Affairs ’ Category

DIY Vinyl Stickers

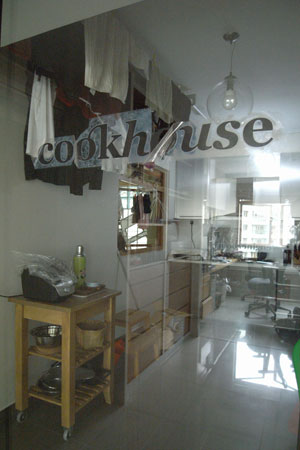
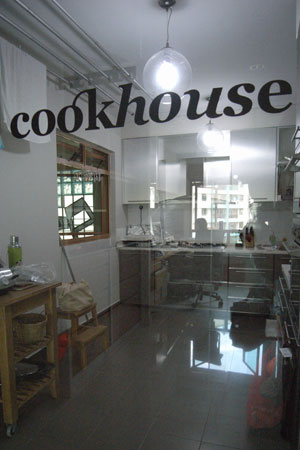
We tried painting on our glass panels but they turned out horribly… so finally, we decided to just print out vinyl stickers and apply them directly onto the glass panels.

Simple steps:

  1. Design your own logos/wordings at the ACTUAL SIZE (word of caution: printer might charge more for complex designs + you will hang yourself in the attempt to apply the stickers…)

  2. Get them printed – you basically choose a vinyl colour and they will diecut your design, I reckon… we got them done at MISTERPRINT @ Bras Basah, #02-91, just next to the elevator, look out for Ultraman. We paid $25 for an A3 size sheet. Printing will take around 1-2 days 🙂 We got the transparent background ones.

  3. Prep your glass panels, clean off any dirt/smudges etc

  4. Put some soapy water (just a tiny bit of soap in water, not too much) on the area where u are going to apply the vinyl stickers.

  5. Note the position to stick (if need be, using masking tape, erasable markers to indicate)

  6. Carefully unpeel the stickers from their backing and slowly apply the stickers from one end to the other, even-ing out the air bubbles as your stick. IMPT: If you make a mistake, dun yank the stickers, they will go out of shape! Slowly peel them back and reapply!

    Patience Is The Key!

    Patience Is The Key!

  7. Leave the vinyl to dry

    Almost There!!

    Almost There!!

  8. Remove the backing layer, and VOILA! 🙂

    Stuck On You!

    Stuck On You!

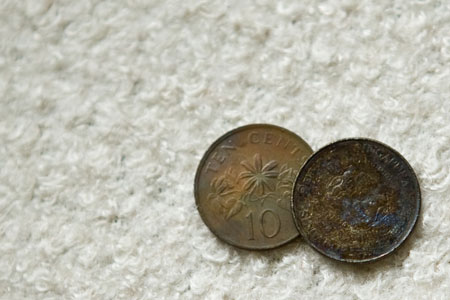
When 20cents is worth $80.

Yes, strange sentence right? Even mathematically it’s impossible. But that’s exactly true…

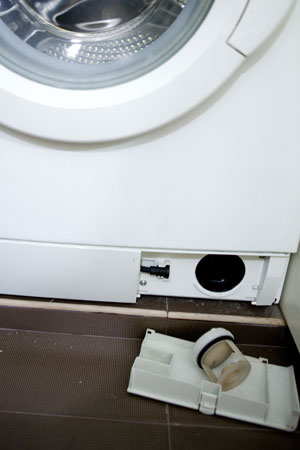
Strange noises were coming from my washing machine during the high-speed rinse cycle (think loud clanging noises as if some people are fighting an intergalactic washing machine war in the washing machine), so after 2 whole weeks of trying to get the service staff to come down to my place, which they eventually did, the culprits are….

Yes, the Worth Coins

Yes, the Worthy Coins

They have been stuck to the draining filter (and yes I tried unscrewing the filter cap but they are stuck in the tracks so the filter can’t be unscrewed) and during the high rinse cycle, they knock themselves against the propeller… which sounds like a intergalactic war..

$ave $ome Money....

$ave $ome Money....

For those of you who experience this alarming sound, dun worry, no aliens in your washing machine… just look out for the drainage portion and remove any alien objects…

Last tip: listen to your wives, mothers, mother-in-laws: REMOVE THE DARN COINS & EVERYTHING ELSE FROM YOUR POCKETS BEFORE THROWING YOUR DIRTY LAUNDRY IN THE WASHING MACHINE!!!

Yes, the bill for the service man to appear at my place and remove the coins added up to $80.25. Go figure…

How To Paint Your Own Wall Graphic

Yes, in the midst of doing up our place, we’d decided to incorporate graphic elements into our house and over time, decided against having wall decals but painting direct unto the walls to give a more rustic and “genuine” feel vs the stark vinyl graphics. Having being in the design business for 8 years, we thought that we should infuse some of our own character into our place so off we went 🙂

Stuff Required:

1) Pencil + Erasers or in Singapore, we call them Rubber.
2) An assortment of brushes in different size
3) Paint (duh?!?)
4) Paint receptacle (you can paint directly out of the can or if you need to mix paints, use a container of sorts)
5) PATIENCE!!!!!!!

Simple Steps:

  1. Prep your area: clear items out of the way, lay out newspaper on the floor. Makes your life much easier later..

  2. Very Important: Prep your walls – clean, clean and clean!

  3. Have a nice coat of paint to make things look fresh, you don’t want to spend hours of painting and discovering the next day that there was a yellow patch behind your paint… do choose dark wall/base colours your own risk, sure they look funky in restaurants but they leave nasty dust marks…

  4. Plan your design & colour: when you choose the paint for your graphic, do remember to colour match. Remember that designs do have lifespan so having a timeless design and colours to match your base wall is crucial. You don’t want to have a Pokemon design on your wall with bright contrasting colours that will give you migraine everytime you enter the room, right?

  5. Sketch out your design using a pencil either freehand or using a projector to project the image unto the wall. All the designing and illustrations picked up from hue & ink is coming in handy 🙂

    Using a Pencil To Outline The Wall Graphic

    Using a Pencil To Outline The Wall Graphic


  6. Prep your paint: When you opened your paint and saw that the colours need some matching, just do it 🙂 Remember those days in primary school when we need to learn to mix colours to create colours, time to practice that! We needed a darker shade of grey for our graphic and so we added more black paint to the grey we bought. IMPT: If you need to mix colours, make sure you mix the right type of paints – water based with water based or oil based with oil based. Water and oil won’t mix!!! Also, please mix more than you think you need, coz in the case when you run out of paint, you won’t be able to remember what’s the original colour mixture you’d created.

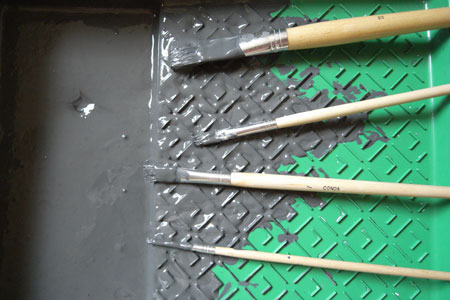
  7. Take your time to paint. I tend to think using the big brushes for big areas and small brushes for the edges and details is basic logic. When possible, paint in strokes in a single direction to create a more uniform stroking texture 🙂

    Tip: If you are using water based paint, prepare a damp cloth to quickly wipe away errors, let the area dry and start over 🙂 DO NOT USE PAPER as they will leave paper dust on your walls, especially if they are dark coloured ones.
    )

    Get Brushes of Different Sizes for the Best Outcome 🙂

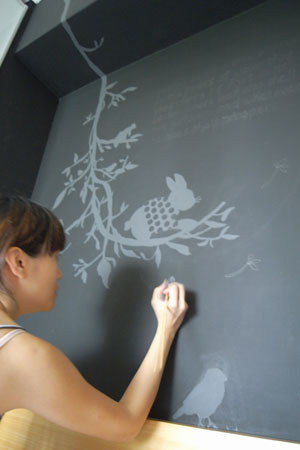
    Slow and Steady Wins the Best Wall Graphic!

    Slow and Steady Wins the Best Wall Graphic!


  8. Take your time to complete the graphic, I recommend turning on the fan for shorter drying time. Once the paint had dried, do any necessary touchups and erase all the pencil marks with your rubber!

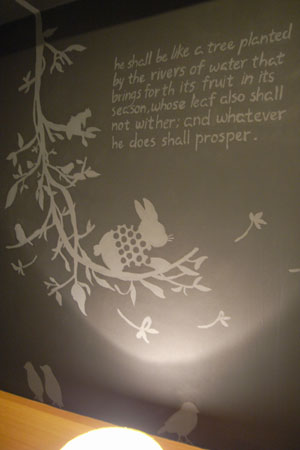
  9. At the end of it all, you will have a all original room to call your own!

    Enjoy The Fruit of Your Labour!

    Enjoy The Fruit of Your Labour!

Got Fabric Sofa, Must Protect

Yes, finally I’d gotten my fabric sofa after a long wait. Before I enjoy the lovely sofa, I remembered to do something UBER important, put a layer of stain protector over it 🙂 Sure it costs around SGD$18, but definitely worth the money over dry cleaning and changing another sofa, or the missus’ stare 🙂

Just simply buy a can from Carrefour or Giant or any of those DIY shops like Homefix, Selfix, open your windows, spray 1 layer evenly over of Fabric Protector over the sofa, let it dry, and do a second/third coat. According to the instructions, a few lighter layers is better than 1 wet heavy layer 🙂

Now you can dun be kancheong over spilling of drinks, tidbits over your sofa 🙂

The Infamous Stain/Marks Remover

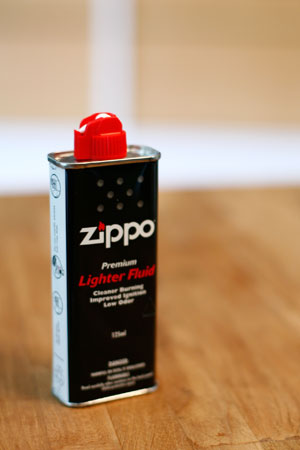
Yes, there are many many products out there that vows to clean your stubborn stains and do miracles, but I’d found one that worked 99% of the time which remove stains in a second 🙂 Letting you into the least known stain remover – the humble LIGHTER FLUID! Got any marks, glue etc etc on your floor, wall, glass etc? Try this… works miracles! I love to use if for removing sticky tape residue, dirt marks on tiles, stains on glass…

The Least Known BEST Stain Remover

The Least Known BEST Stain Remover


IMPORTANT NOTE: DO NOT USE ON PLASTIC!!!! WILL CAUSE PLASTIC TO TURN CLOUDY 🙂

Tips on Electrical Stuff

With the soaring electricity bills, here are some cool ideas on how to save electricity, which translates to savings in $$ 🙂

  1. MASTER MASTER!
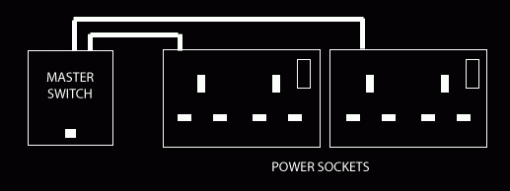
    Install a MASTER SWITCH for your TV console area. When you leave electrical appliances in the “Standby” mode (ie. when you switch them off using your remotes), they are not actually turned off. They are still drawing current which is akin to a tap that’s left dripping… To fully turn them off, you need to switch off the plug. By installing a master switch, you just flick it and they are all off.

    Master Switch Concept

    Master Switch Concept

    *Tip 1: Locate it at a easy to reach place so you can remember to turn the master switch off.

    **Tip 2: If you are using a VOIP Telephone (e.g. Starhub’s Digital Voice) or Wireless Network that’s connected to your modem that’s connected to your TV cable point, put the modem in a non-master switch connected power socket so when you keep the power off, the modem and phone will still be working.


  2. 15 MINS TO SAVE THE WORLD
    Buy a water heater that corresponds to your family size. Think of the water heater as a giant kettle, once the water is heated, it is stored for a period of time. Unless you love scalding hot water when you bathe, you can turn off your water heater after 15 mins and still enjoy warm water when you bathe.

  3. LOOK FAR AHEAD
    Buy/Install Energy saving bulbs. They are called energy saving for a reason 🙂 You pay more initially to save more eventually.

  4. GAS GAS GAS!
    When buying a cooker, do choose wisely on whether you will buy a regular gas cooker or induction cooker. While induction cooker is touted to be safer, they tend to consume more power. So you got to do some calculation on gas $$ vs. eletricity $$

  5. BIGGER AIN’T NECESSARILY BETTER
    That giantic 50″ LCD/Plasma TV sure looks great… they consume giantic amounts of power as well and did I forget to mention, they generate tons of heat as well. We had a 42″ Plasma TV that died due to overheating in a enclosed featured wall *See next tip. Not to mention that unless you buy the top notch screens and watch blueray discs all the time, you will hate the regular TV channel’s resolutions

  6. TO FLUSH OR NOT TO FLUSH
    When your designer proposes your TV to be flushed with the most elaborate feature wall, tell him to throw in a LCD TV to replace the one that’s gonna die. When LCD/Plasma TVs are flushed into cavities, they do not have the allowance for heat dissipation which translate to melting of the TV’s components. Trust me, ours died.

Renovation & Contractors…

Had just help my parents settle their renovations in their 20+ years old 3-room resale HDB flat and had learnt a few lessons. Good for people looking to renovate their place!

First, decide on a budget, that will equate using Interior Design firms or using Contractors.

PROS & CONS
 
Interior Designers

  • + Will do all coordination between all contractors, 1 point of contact, 1 point of responsibility (you know who to look for when things don’t turn out right)
  • + Provide design services so it will help u nail down how your dream home can look like
  • + Normally comes with min. 1 year “warranty”.
  • – More costly

 
Contractors

  • + Cheaper (depends on who you look for and type of job
  • + If you are doing minimum work without design = no design fee. Some provide basic design.
  • – More supervision, more points of contact
  • – Harder to track if something goes wrong. Likely no “warranty period”

  
WHAT TO DO

  1. Decide on a budget and a buffer amount. DO NOT make the amount flexible as it will then likely end up to be a huge amount after all the add-ons.

  2. Do your research to see what designs you are after from magazines, websites.

  3. Ask your friends for good referrals for Interior Designers

  4. Shop around for prices and quotations. Many interior design firms offer non-obligatory quotations and some even provide free 3D renderings for the 1st meeting. Do a little research using local ID magazines to sieve out which firms you like and make contact. If need be, chase them for the quotation. We’d have met some firms who did not even bother to reply…

  5. Narrow down to 1 or 2 firms and play the price bargaining game (this is where the other quotes will come in handy).

  6. After you choose your design firm/contractor, let them know your budget is fixed (do not let them know about your buffer) and squeeze them for the most out of your budget before awarding the contract. Unknown to many, you can get the designers to throw in free fixtures/light switches etc 🙂

  7. IMPORTANT NOTE: Normally, the electrical wiring costs is another costing not factored in when the designer does up the quotation. Average cost for electrical works is from $2000 – $3000 dependent on the number of power points etc. If you are hacking away walls and existing tiles, this will also be an additional cost. Hacking existing tiles is also quite costly 🙂

  8. Make sure the designer shows you exactly how you want your house to be. Dun feel shy to keep asking them to amend the designs till you are totally happy. You can also ask them to show you variations of the design like different materals for wardrobe etc. If not, you will always regret having the striped walls and having to live with it for the next 5 – 10 years.

  9. Make sure you know what you are paying for, some firms provide very cheap costing as they use “lousier” materials like thinner shelves, thinner plywood and cut corners during the production. See my other post on this.

  10. Do make regular visits to your home during the renovation period to make sure things are happening according to your design. You will be surprised how many mishaps can happen at this stage.

  11. Do not pay the designer/contractor in full though the work is completed. Ensure that all the little nitty gritty things like cleaning up/touching up paintwork, door alignments etc are all done before handing over the moola. If not, you will have a hard time requesting them to return to complete all these touchups

  
Trust me, knowing the above will save you a lot of heartache and frustrations 🙂

Last words, while being wise with your $moola, do be big hearted to workers and the designers. Buy drinks, food, snacks when you visit the site, happy people means better work. If they know you care, they might do better.

Dun be stingy with compliments for your designer. If he/she had done a good job, tell them so.